Are you tired of hearing strange noises coming from your Kenmore dryer? Does it seem like your laundry takes forever to dry? It might be time for a Kenmore dryer belt repair. In this comprehensive guide, we’ll walk you through the process step by step, ensuring your dryer runs like new again.
Introduction
Your Kenmore dryer is an essential appliance in your home, helping you keep your clothes clean and dry. However, like any other machine, it can develop issues over time. One common problem is a worn-out or broken dryer belt. The good news is that you can perform a Kenmore dryer belt repair yourself, saving both time and money. In this article, we’ll provide you with a detailed guide on how to diagnose and repair your Kenmore dryer’s belt issues.
Kenmore Dryer Belt Repair: What You’ll Need
Before we dive into the repair process, let’s gather the tools and materials you’ll need for a successful Kenmore dryer belt repair:
- Tools:
- Screwdriver
- Nut driver
- Putty knife
- Needle-nose pliers
- Materials:
- Replacement Kenmore dryer belt
- Replacement pulley wheel
- Replacement tension spring
- Safety gloves
Diagnosing the Issue
The first step in the Kenmore dryer belt repair process is diagnosing the problem. Here’s how to do it:
- Unplug the Dryer: Ensure your safety by disconnecting the dryer from the power source.
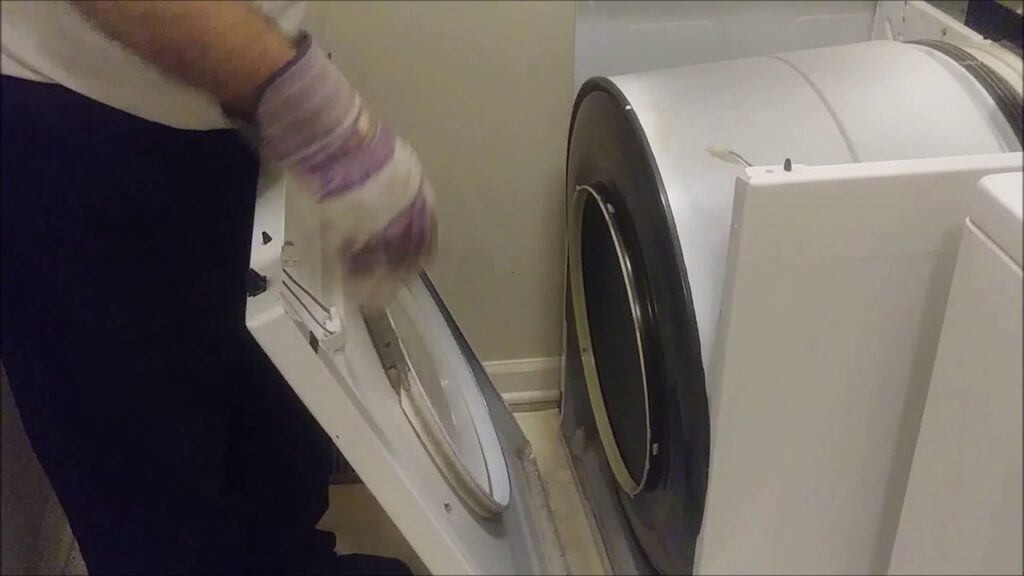
- Access the Dryer Belt: Depending on your Kenmore dryer model, you may need to remove the dryer’s front or rear panel to access the belt. Refer to your user manual for specific instructions.
- Inspect the Belt: Carefully examine the dryer belt for any signs of wear, fraying, or breakage. If you notice any damage, it’s time for a replacement.
- Check the Pulley and Tension Spring: While inspecting the belt, also examine the pulley and tension spring. They should be in good condition and functioning properly.
Replacing the Kenmore Dryer Belt
If you’ve determined that your Kenmore dryer belt needs replacement, follow these steps:
- Order the Replacement Parts: Make sure you have the correct replacement belt, pulley wheel, and tension spring for your dryer model. You can usually find this information in your user manual or by searching your model online.
- Unplug the Dryer: Safety first—always disconnect the dryer from the power source.
- Access the Belt Area: Depending on your dryer model, you may need to remove the front or rear panel to access the belt. Follow the instructions in your user manual.
- Remove the Old Belt: Carefully release the tension on the belt by removing the tension spring. Then, slide the old belt off the pulley and motor shaft.
- Install the New Belt: Place the new Kenmore dryer belt around the drum, ensuring it follows the same path as the old one. Reattach the tension spring to create the right tension.
- Reassemble the Dryer: Put back the front or rear panel, depending on what you removed earlier.
- Test the Dryer: Plug the dryer back in and run a test cycle to make sure everything is working correctly.
Conclusion
Performing a Kenmore dryer belt repair can save you time and money while keeping your dryer in top working condition. By following our comprehensive guide, you can tackle this DIY project with confidence. Remember to prioritize safety, follow the instructions closely, and enjoy the satisfaction of a smoothly running Kenmore dryer.